Kawasaki has recently patented a new type of electronic brake that could help to reduce the risk of low-side crashes on bikes.
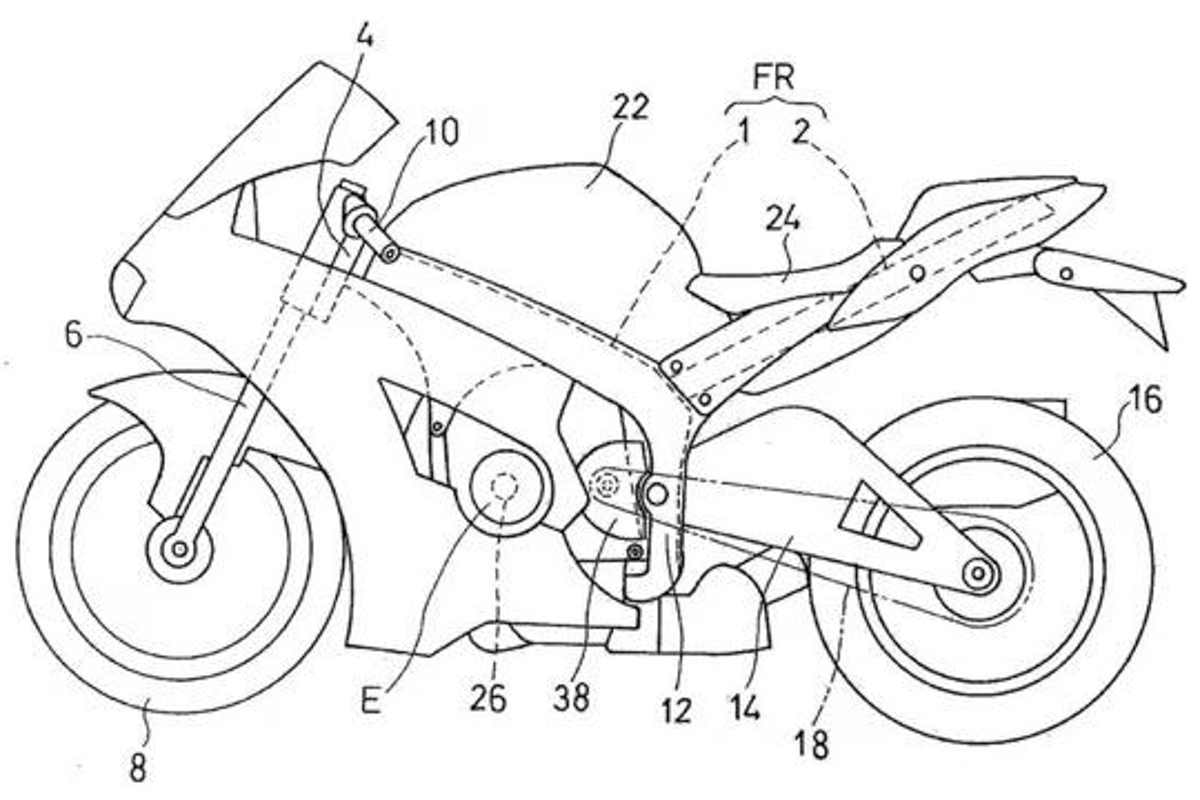
Kawasaki has patented a new type of electronic brake that applies a load to the bike’s chain wheel during deceleration to reduce the risk of low-side crashes.
The system aims to stabilize the bike during critical moments, particularly when the front brake is released.
According to reports by Visordown, the technology is designed to work on the chain wheel of the bike and uses a type of magnetic clutch that can be electronically actuated to apply a load to the chain during deceleration.
When a bike is braking into a corner, it slows down and compresses the suspension, pushing the front tire into the Tarmac, and increasing the amount of grip there is at the front end of the machine.
However, when the front brake is released, the springs in the forks try to return to a normal position, reducing the pressure on the front tire and reducing the amount of grip it has. This can lead to a low-side crash if the front end loses grip.
The Kawasaki system aims to solve this problem by applying a load to the bike’s chain while decelerating, even after the front brake has been released. This means that the bike will still be applying some force on the suspension, reducing the rebound action of the forks that can cause a low-side.
While the system may seem like a natural fit for a sports bike ridden on a track, Kawasaki is reportedly considering using the technology on its road-going sports touring machines too. With radar-assisted cruise control becoming increasingly popular on top-spec models, manufacturers are always looking for new ways to control a bike’s speed without relying solely on the braking system, which can be unsettling for both the rider and the bike.
While this new technology is still in its early stages, it could represent a significant step forward in motorcycle safety. As always, riders should continue to prioritize safe riding practices and seek out training and education to improve their skills on the road.
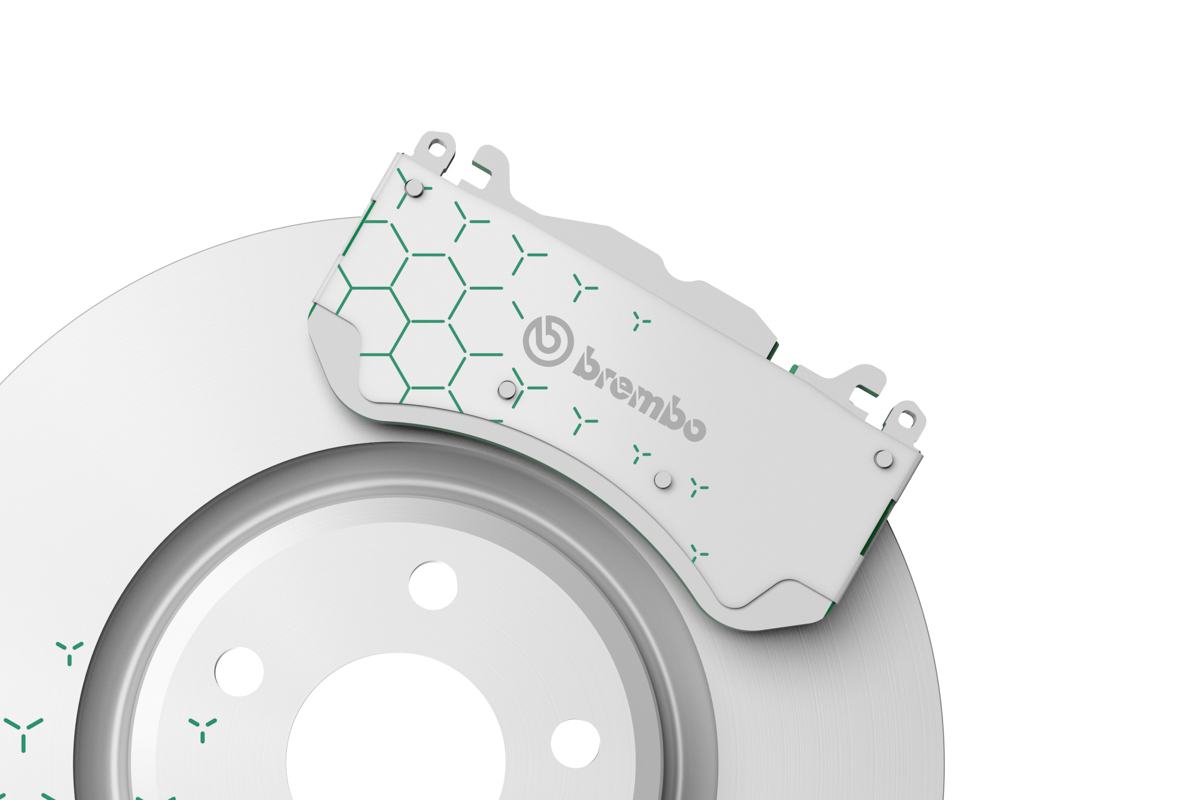
Brembo is ready to go green after successfully producing high-performance brake pads that are less harmful to the environment.
Brembo Greenance brake pads is less harmful to the environment.
Features lower non-renewable materials.
According to Sebastinio Rio, Chief Operating Officer of Brembo, the approach made is by reducing the use of non-renewable materials in construction and using eco-friendly manufacturing methods.
“We are adding a reduction in wear, so that is a green aspect as we are reducing consumption.
“Meanwhile, we have removed some components such as copper and nickel to maintain those components as green.
“Plus in the manufacturing process we have cut something like 60% energy consumption. It’s a combination of a green product and a green process,” Rio told MCN.
Interestingly, while saving the environment, the Greenance brake pads also claimed an increase in stopping power thanks to better heat resistance.
According to Brembo, the Greenance pads also meet European safety standards and feature NUCAP Retention System. Nevertheless, Rio stated that the company’s green efforts would continue to evolve.
“We are still working on trying and making our products more green every time.
“We are now having a look at recyclability, aluminium is recycled. We are working in a different environment with a reduction of waste and the utilisation of water in our factory, and the consumption of energy,” he added.
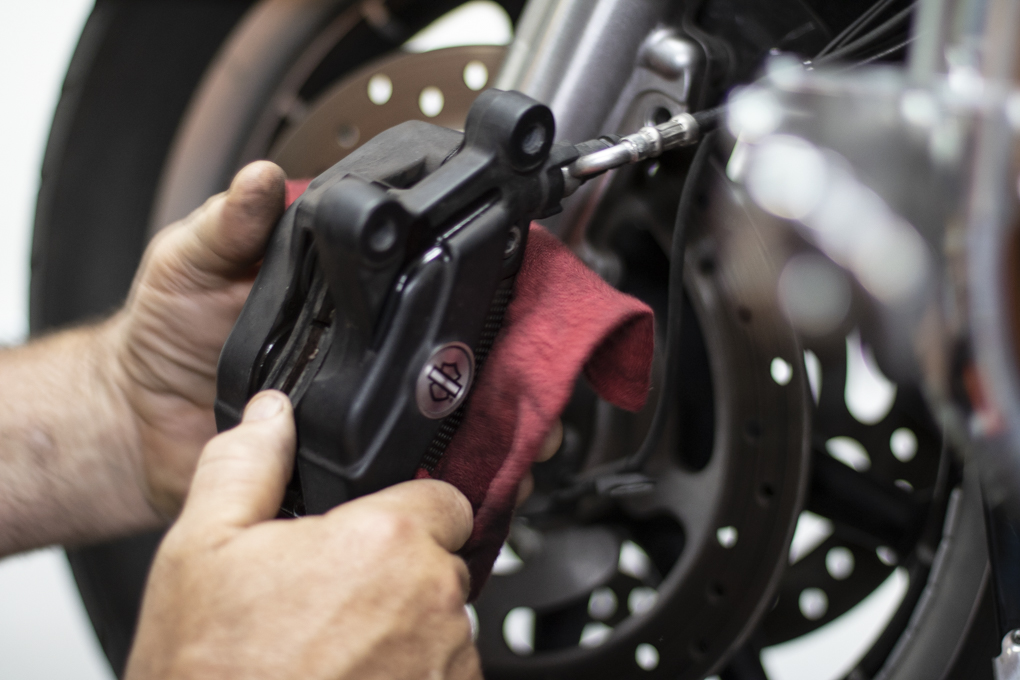
Bikers usually talk about performance and aesthetic upgrades.
But how many actually talk about brakes and brake maintenance?
Today, we look at how often should replace the brake fluid.
It surprises me that in my 33 years of riding, no one had ever asked, “How often should I replace my brake fluid?”
I’ve always been asked what’s the best performance parts such as exhausts and tyres, instead. It’s not wrong to ask about those parts, of course, but brakes are the most critical next to the almost everything else on the bike.
However, I do understand why almost nobody talks about brakes. Modern brake systems are very reliable. Apart from replacing the brake pads whenever they’re worn, the system keeps working: The rider presses the lever and the bike slows down. When the pads are worn again, he replaces them.
In a brake system that performs normally, performance deteriorates slowly and surreptitiously. Consequently, you won’t feel much difference since the last time you rode it. This will continue until we encounter serious problems.
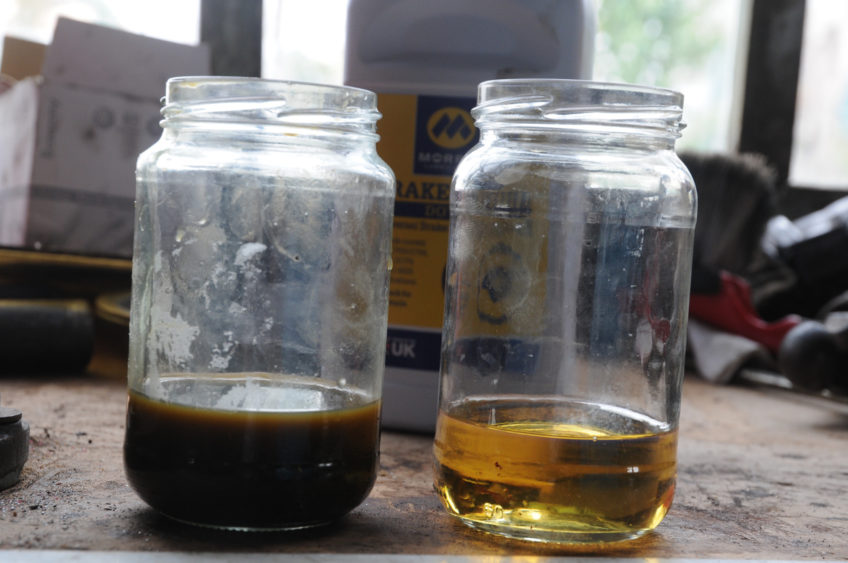
But what about the fluid? Sadly, no one seems to bother. Brakes are working after all. News is, deposits will start to build up in old brake fluid. If you’re unlucky, these deposits may someday flow into the nooks and crannies and block the flow of fluid in the system. In the worst-case scenario, deposits build up or get into the ABS pump and render it useless. When this happens, the part must be replaced, which costs thousands. Believe me, I’ve seen this happen in both bikes and cars.
Old vs new brake fluid
Besides that, brake fluid is hydroscopic i.e. attracts moisture. The system may be sealed but wear and tear can eat away at a gasket or two. The presence of moisture in will lower the brake fluid’s boiling point. When this happens, the brake takes more effort to work. In a bad scenario, the brake lever will feel spongy. In the worst case, the lever has been pulled all the way back and sticking to the handlebar, yet the bike doesn’t slow down at all.
So, how often do you need to change your brake fluid? Every two years, regardless if the fluid “still looks good.” The job is easy enough that you could DIY (do-it-yourself), but you can also visit a workshop if you aren’t confident or need more tools.
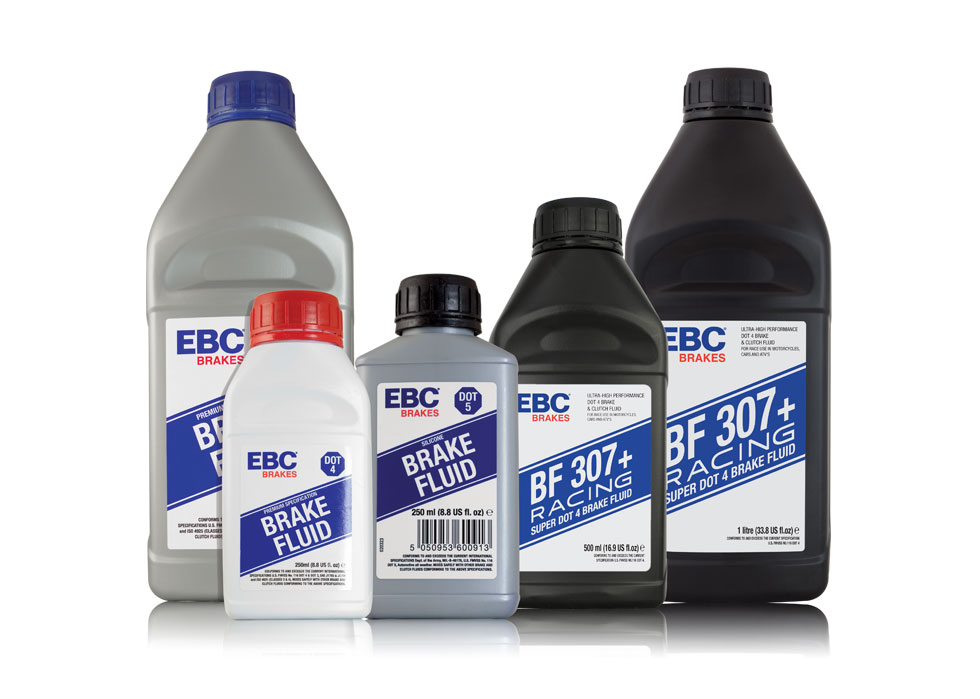
What DOT should I use? Just follow the manufacturer’s recommendations. For example, use DOT 4 if that’s recommended. Try not to be seduced by the mechanic’s “Ini barang baik punya (This stuff is good)” sales pitch, especially if the fluid is of different DOT rating or for racing. Racing brake fluids are usually even more hydroscopic!
Brembo has expanded its brand family after announcing the acquisition of J.Juan.
The Italian company has signed an agreement to acquire a 100 per cent stake in J.Juan Group.
J.Juan Group specialises in developing a motorcycle braking system and currently runs two factories located in Spain and China.
For those who are not aware of J.Juan, the company is responsible is supplying the brake system for Benelli and Zero Motorcycle.
It is understood that the acquisition of J.Juan for EUR70 million (RM347mil) allows Brembo to access the Spanish company research and development and manufacturing capabilities in the two countries.
Brembo currently owns ByBre, Marchesini and SBS Friction.
“We are proud to welcome J.Juan in the Brembo Group.
“This transaction is in line with our global strategy and follows the recent acquisition of SBS Friction in Denmark.
“We continue to invest with the aim of strengthening our motorbike core business. The addition of J.Juan is a great opportunity for us, as it reinforces our positioning as a company increasingly oriented to offering comprehensive, integrated and high-quality solutions to our customers,” said Brembo Chairman Alberto Bombassei.
Despite dominating the performance market, Brembo still facing a big challenge from Nissin and Beringer.
The brakes are often misused – they are not only for stopping.
The modern brake systems are there to assist the rider in many ways.
But it is the rider who has to use them correctly.
Of all the rider inputs, braking is often the most misunderstood or wrongly performed.
The main reason for this is due to how significant deceleration forces work on the rider’s body, in addition to how his bike’s behavior when the brakes are applied. As such, riders are often confused by how tiny fingers could slow a 300+ kg mass (the combine weight of the motorcycle and rider) from 200 km/h down to 50 km/h in a heartbeat.
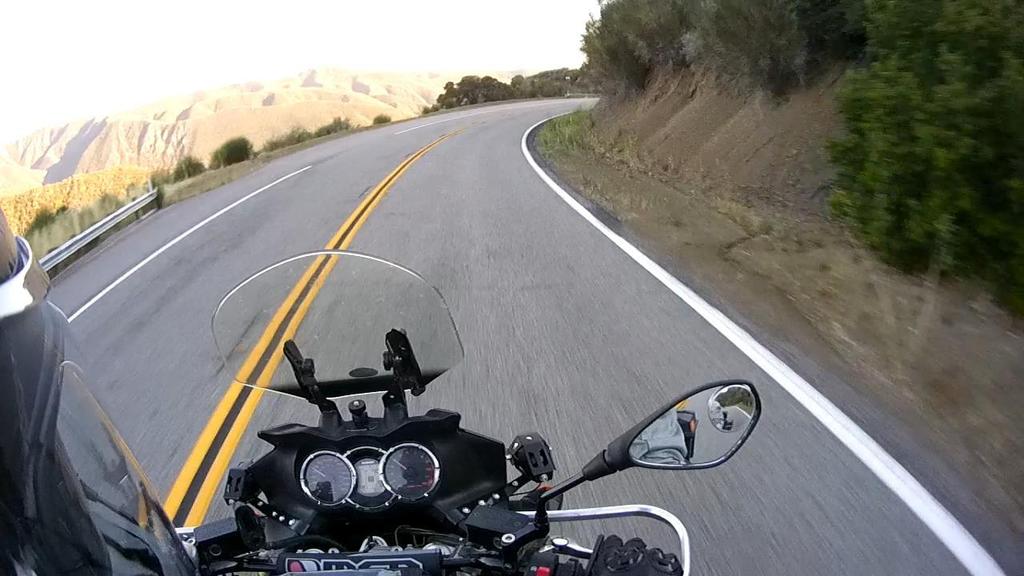
1. Use the brakes to set your target speed
Start thinking of the brakes as a tool to help you set your target speed for a corner. For example, if you’ve ridden through your favourite corner on a daily basis, brake and note the speed before you enter the corner. Doing so will allow you to adjust braking point, braking force and entry speed as well as the turn-in point. Too slow through the corner? Apply the brakes later or release sooner. Too fast? Brake earlier or apply more braking pressure.
It doesn’t help to charge into every corner based on “feel” or “mood”. More often than not, too slow a corner entry will force the rider to add too much throttle in mid-corner, thereby risking the tyre breaking traction suddenly. Too fast into a corner will cause the rider to panic and jump on the brakes, causing the front tyre to either break traction and slide under (low-side) or the bike to stand up and head straight toward the outside of the corner (overshoot).
2. Use both brakes
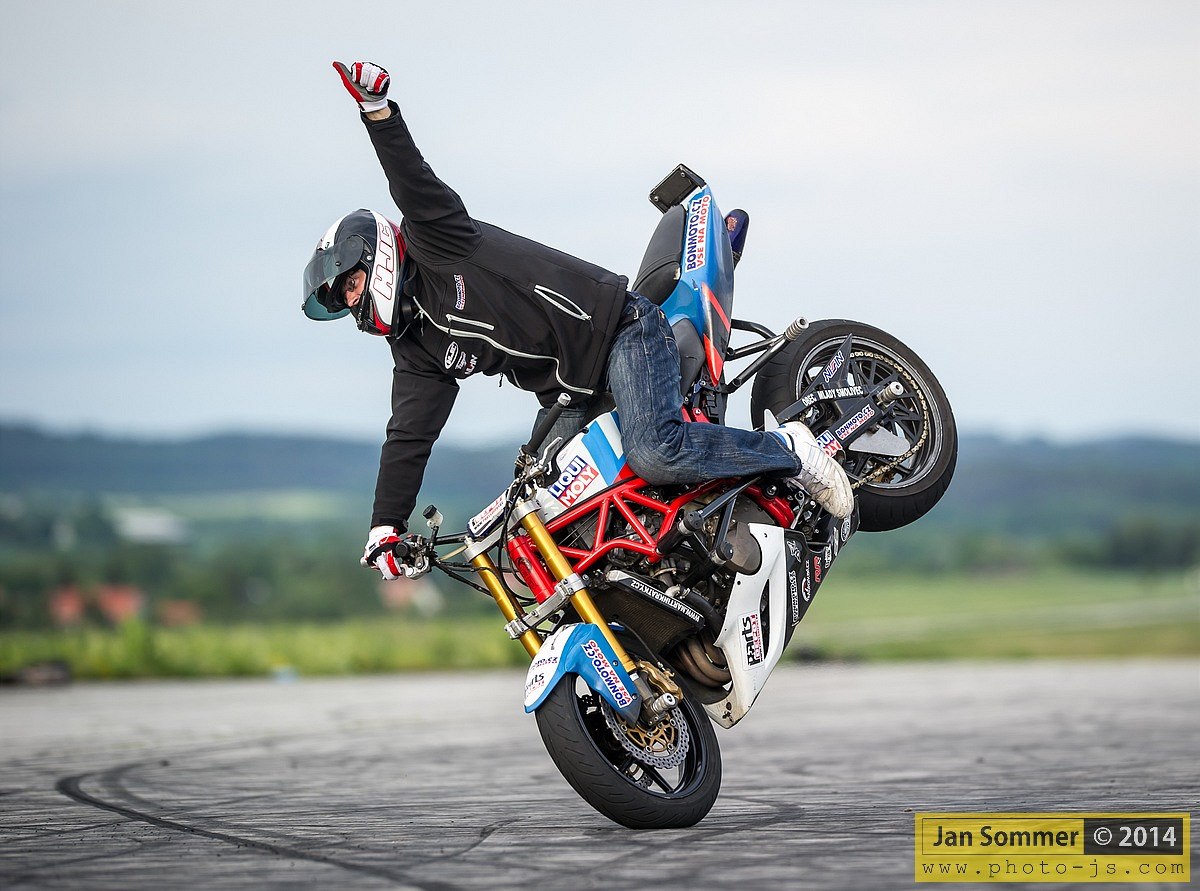
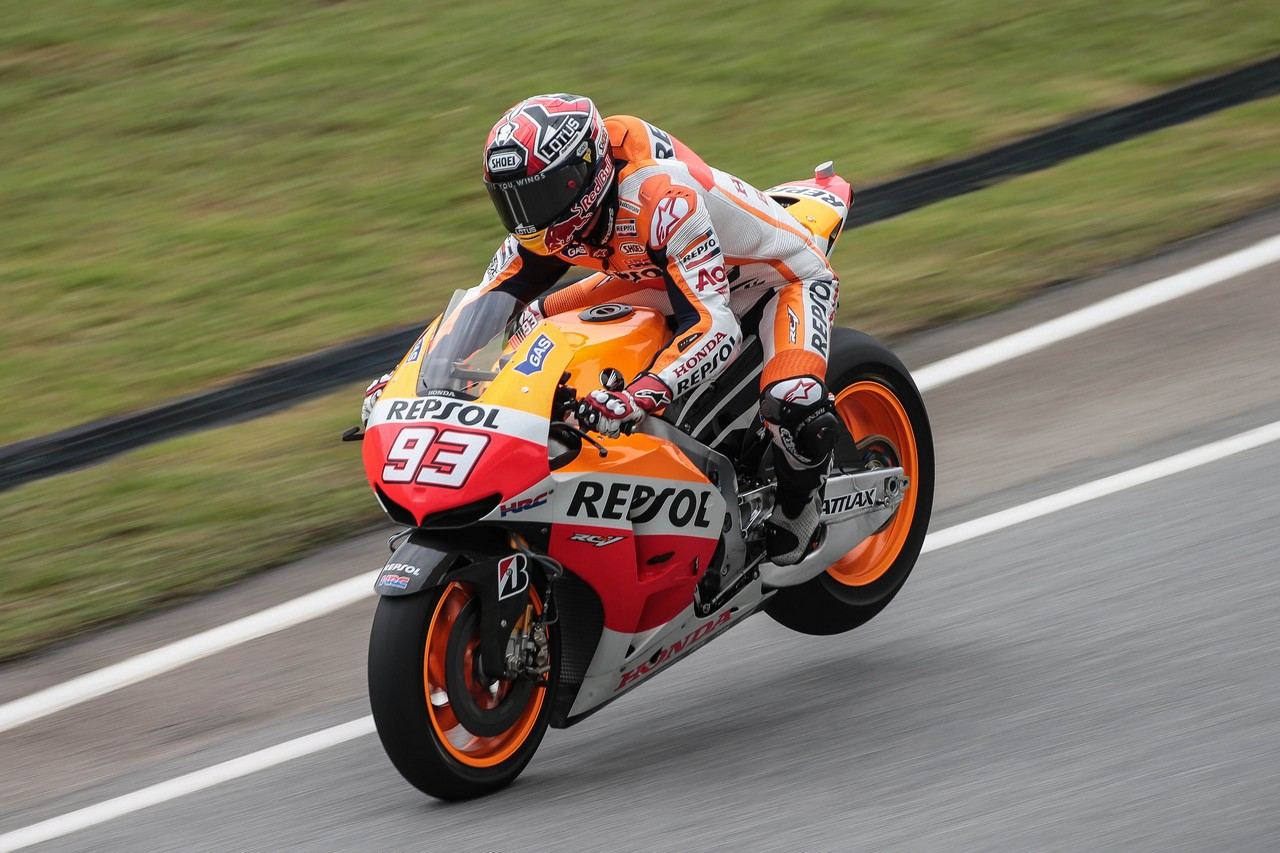
There’s a myth that the rider shouldn’t touch the rear brake pedal unless he’s coming to a stop. Now, unless you’re braking so hard to lift the rear tyre completely off the ground like Marc Marquez, using the rear brake keeps the chassis stable, even if you should feel that using it does not decrease your stopping distance.
If the rear brake is truly defunct in its purpose, why do manufacturers equip their bikes with it in the first place, or lately, the rear-wheel lift mitigation (RLM) electronic rider aid? As the name suggests, it keeps the rear tyre on the ground, allowing the rider to utilize the rear brake. In fact, this rider aid is used extensively in MotoGP (to different degrees among different riders).
Courtesy of Sport Rider
Dragging the rear brake softly while leaned over in a corner helps the bike maintain a tight line. Besides that, it slows the bike slightly without rolling off the throttle or tapping the front brake lever, thus not introducing major abrupt inputs to upset the chassis balance and tyre adhesion.
3. Squeeze, don’t grab
Brakes should be applied progressively (gradually) and not not grabbed or stomped on.
Progressive braking transfers the motorcycle’s and rider’s combined weight progressively to the suspension and tyre. Conversely, abrupt braking causes the wheel to lock. Additionally, mass is slammed forward and eats up suspension travel, causing the front wheel to hop over road irregularities.
If abrupt braking is bad when the bike is straight up, it’s even worse when it’s leaned over on its side. The tyres are already loaded with cornering forces and doesn’t need much more overbraking to overload them. The tyres will either break loose, resulting in a low-side or have the bike standing up and going straight.
So, stop treating the brake levers as ON/OFF switches.
4. Ride loose
Using the arms to support the torso when braking “locks” up the wrists, arms, elbows and shoulders. This in turn means that the rider could only take so much braking forces and gets fooled into thinking that he’s already braking too hard.
Besides that, he would not be able to steer his bike through the corner or out of harm’s way. Ever notice some riders braking hard and still go wide or overshoot a corner?
The trick is to always clamp your thighs onto the fuel tank. That’s the reason why motorcycle designers create knee cutouts (depression) on both sides of the tank. So, clamp your knees onto the tank, and leave your torso and arms as loose (relaxed) as possible. If you’ve never done so during hard braking, you’ll soon discover that you could actually brake so much harder than before, while still being able to steer the bike.
5. ABS helps, not avoid
With all this talk about braking techniques, how does ABS (anti-lock braking system) figure into the equation? Or more accurately, doesn’t ABS take away the need to learn the fundamentals of braking? Oh yes, I’ve had people tell me, “The bike has ABS. The bike will never crash.”
Let’s review what ABS does. Braking is strongest at the point where the tyre is about to break traction. However, that margin between full braking and losing traction is very thin, and once the tyre loses traction, there’s no telling what’ll happen next. When a tyre loses traction, ABS relieves the braking pressure just enough to let the tyre roll then reapply pressure to brake caliper pistons (this happen many times per second).
That’s all good and nifty. However, riders who are unaccustomed to the brake levers pulsing during ABS activation may actually let go of the levers. So, it all comes back to square one: Learn the basics of braking without intervention.
BONUS TIP: Have faith
Frame, chassis, tyre and brake engineering are so advanced these days; more often than not surpassing the skill levels of the majority of road riders.
This is not a criticism of your riding skills, but it serves as a reminder that the limits of the said components are so high, hence there’s plenty of room to go to save your skin at the time when you thought there’s no hope. The point is, have faith in your tyres, suspension, and bike in general and perform the correct actions when you get into trouble, rather than just giving up and letting fate decide.
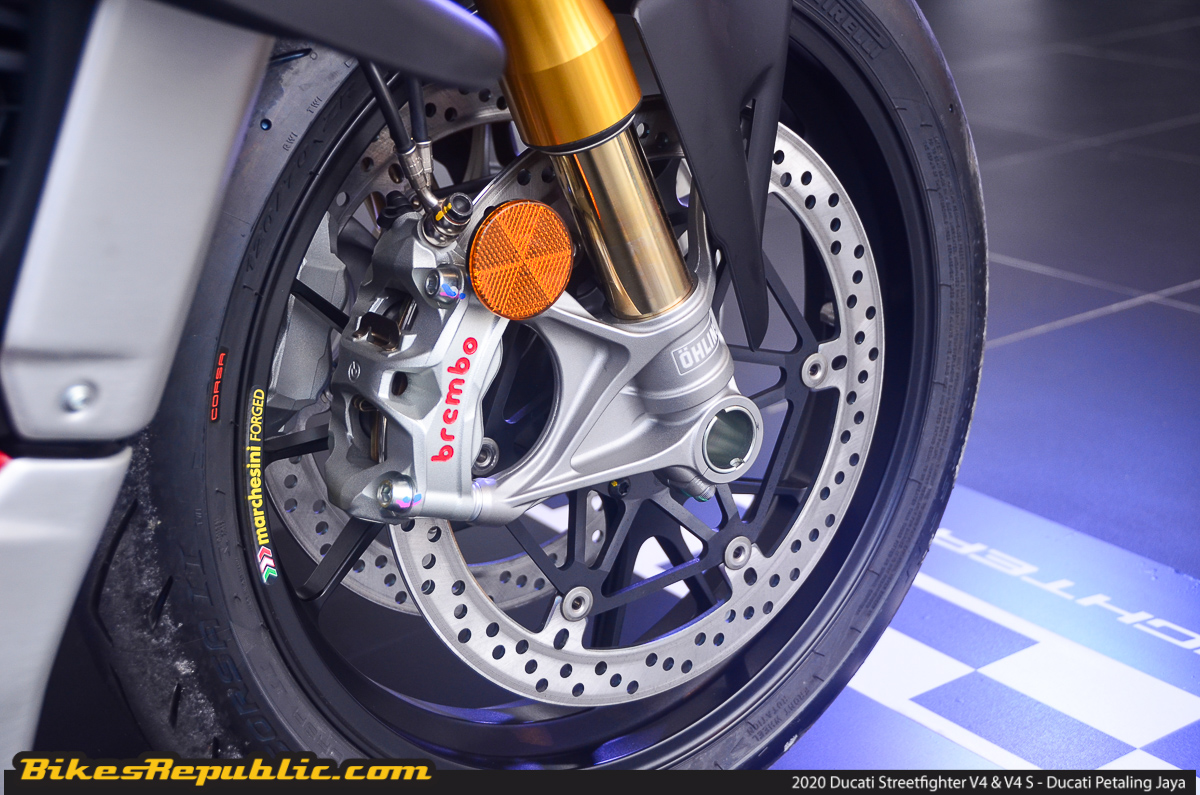
Radial brake caliper mounting is all the rage nowadays.
But the “normal” axial-mounting is still present.
What are the benefits of mounting the caliper radially?
To rehash, we’ve seen the basic principles of the brake system in Part 1, about how the pressure from your fingers is transferred into fluid pressure, resulting in braking force.
Therefore, let’s now examine the methods of mounting the front brake caliper to the motorcycle, or more specifically, about the radial mounting arrangement that’s all the rage these days. Yes, so popular they are that even lowlife thieves couldn’t resist them.
Axial master cylinder
One, the traditional type is the “axial” master cylinder, found on almost all motorcycles with front hydraulic brakes from small to large.
In this arrangement, the master cylinder’s bore is perpendicular to the lever’s travel, seemingly elongated to the left side viewed from the top. A protrusion on the end of the lever pushes the plunger in cylinder, forcing brake fluid into the calipers.
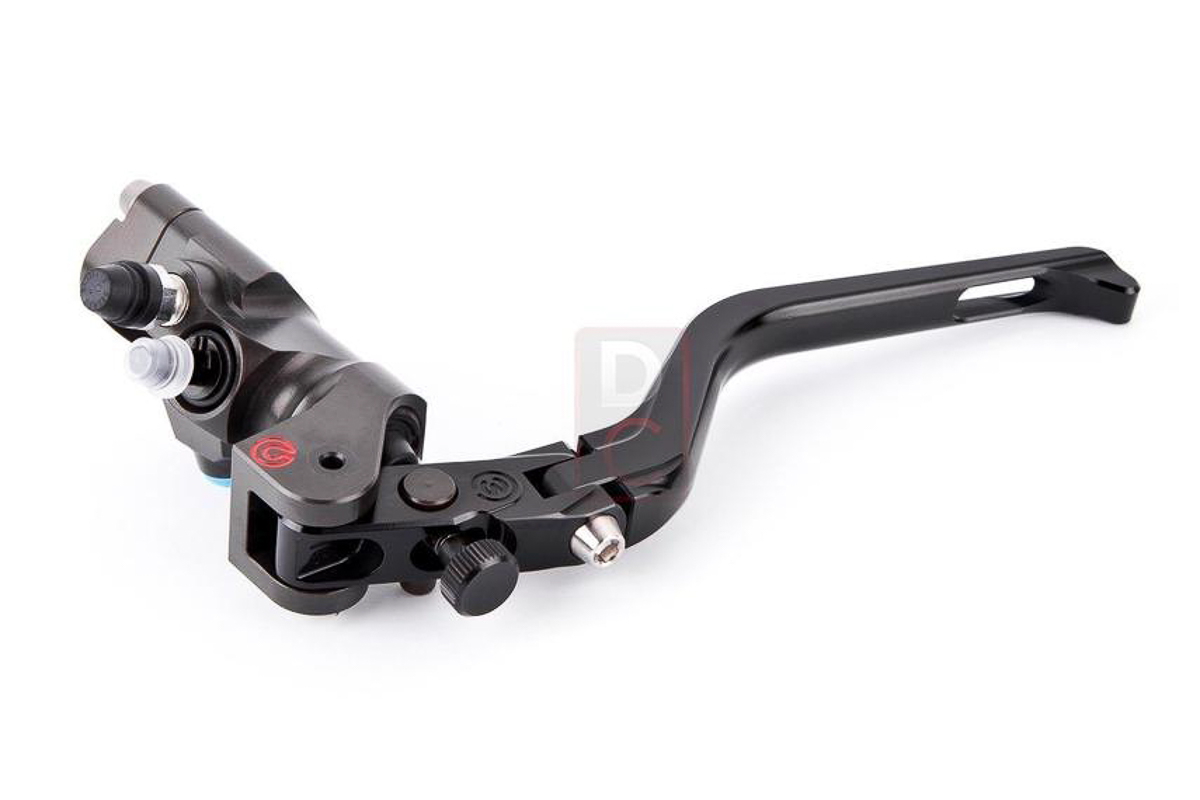
Radial master pump
The second and more recent type is the radial master cylinder. The master cylinder’s bore is parallel to the brake lever’s movement, looking more directly fore-and-aft when viewed from the top.
What’s the difference between the two? Other than a different type of piston movement, the radial master cylinder provides a better feel at the lever for what the brake is doing. The radial master cylinder is more rigid as there are fewer moving parts.
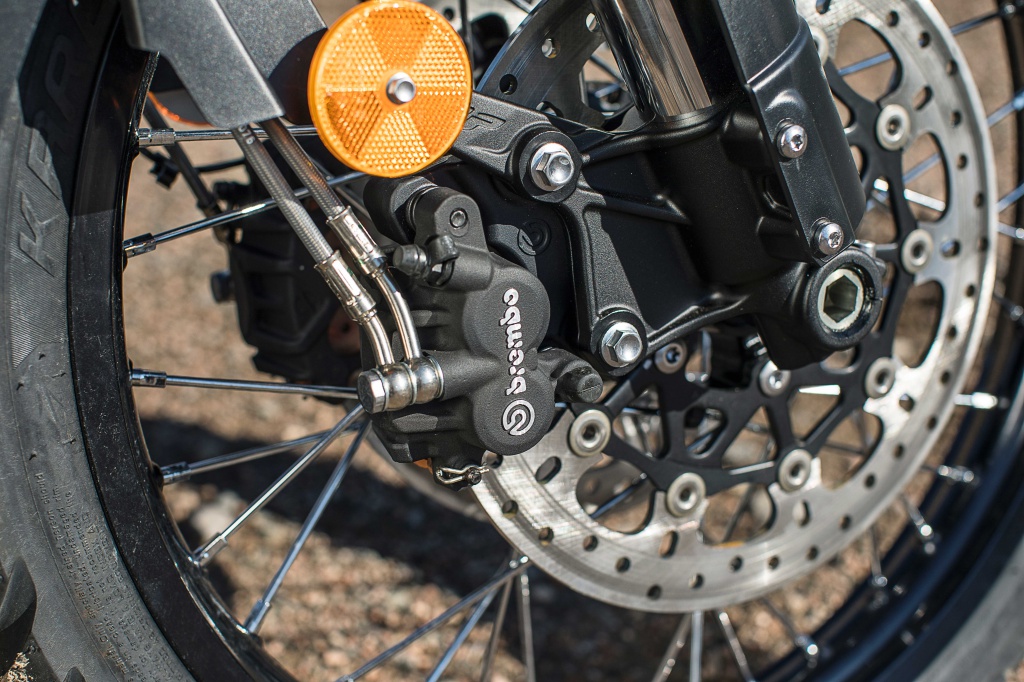
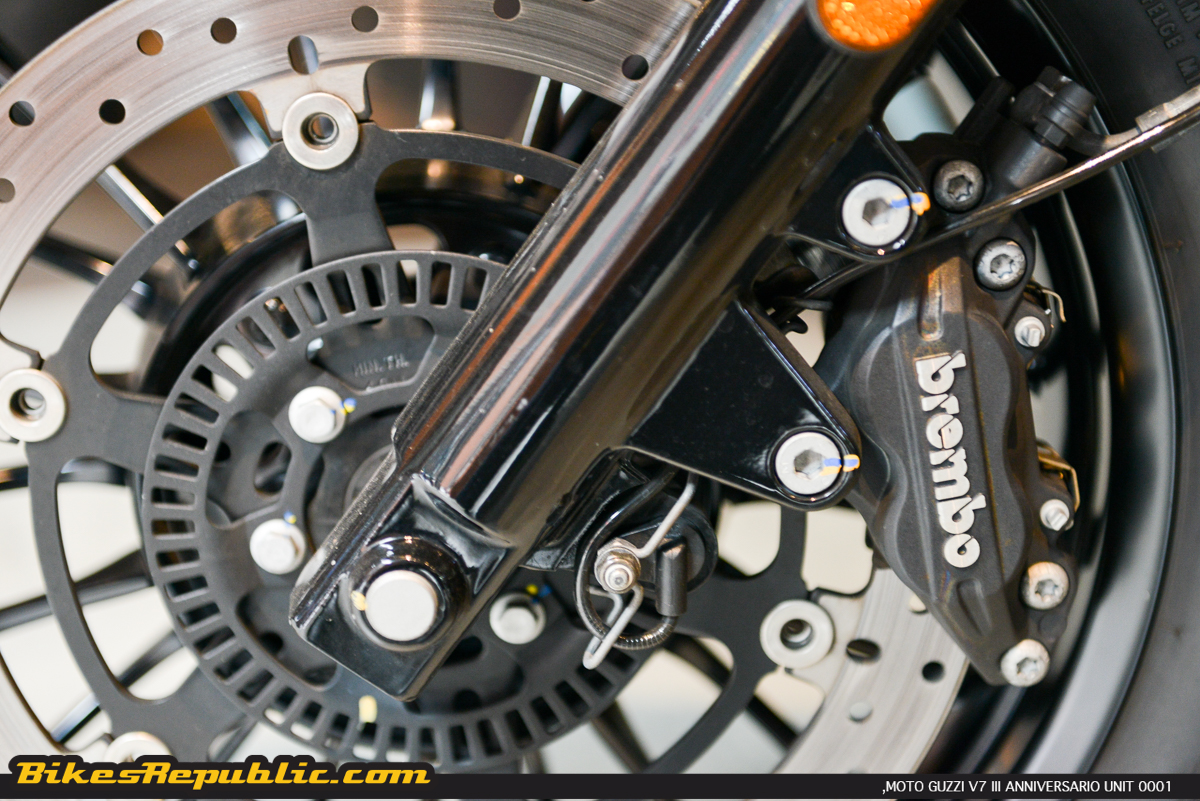
Axial-mount calipers
With the advent of radially-mounted brake calipers, this format has gone on to be called the “normal mounting.” The caliper is mounted to “bosses” cast into a fork’s bottom tube, with bolts that run parallel to the wheel axle.
There isn’t anything wrong with this type of mounting. However, custom brackets need to be fabricated should one want to install a larger brake disc. Other than that, there may exist a little torsional flex for lateral movement, although it’s hardly perceptible when ridden on the streets.
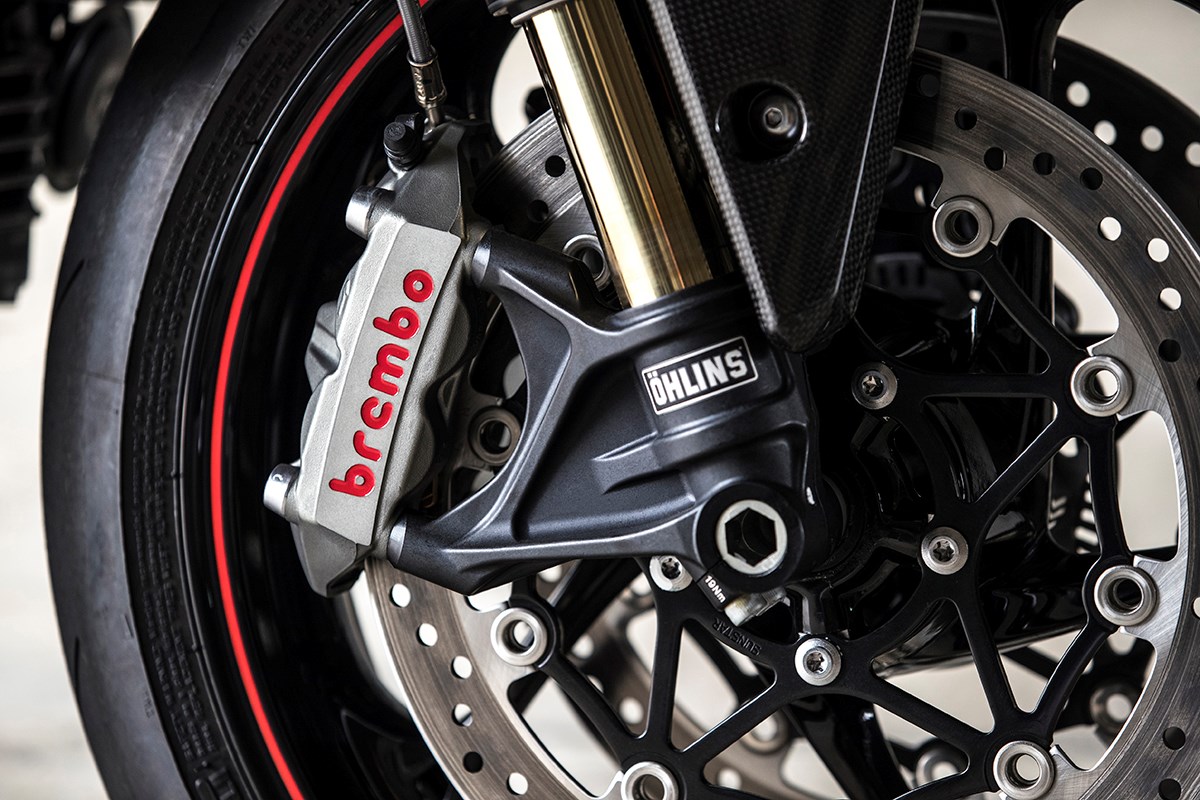
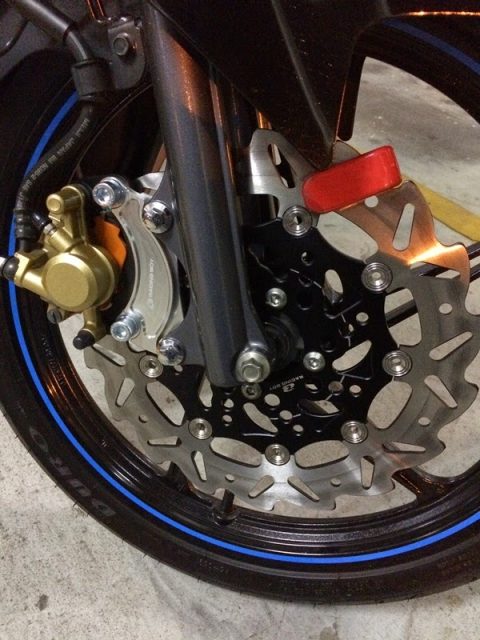
Radial-mount calipers
In this setup, the caliper is still mounted to bosses cast into the lower fork legs. However, the bosses are cast to allow bolts to be fitted directly from the rear, instead of from the side, and perpendicular to the wheel axle.
Being mounted this way means there is virtually no deflection because the braking forces are on the same plane as the brake disc’s rotational forces.
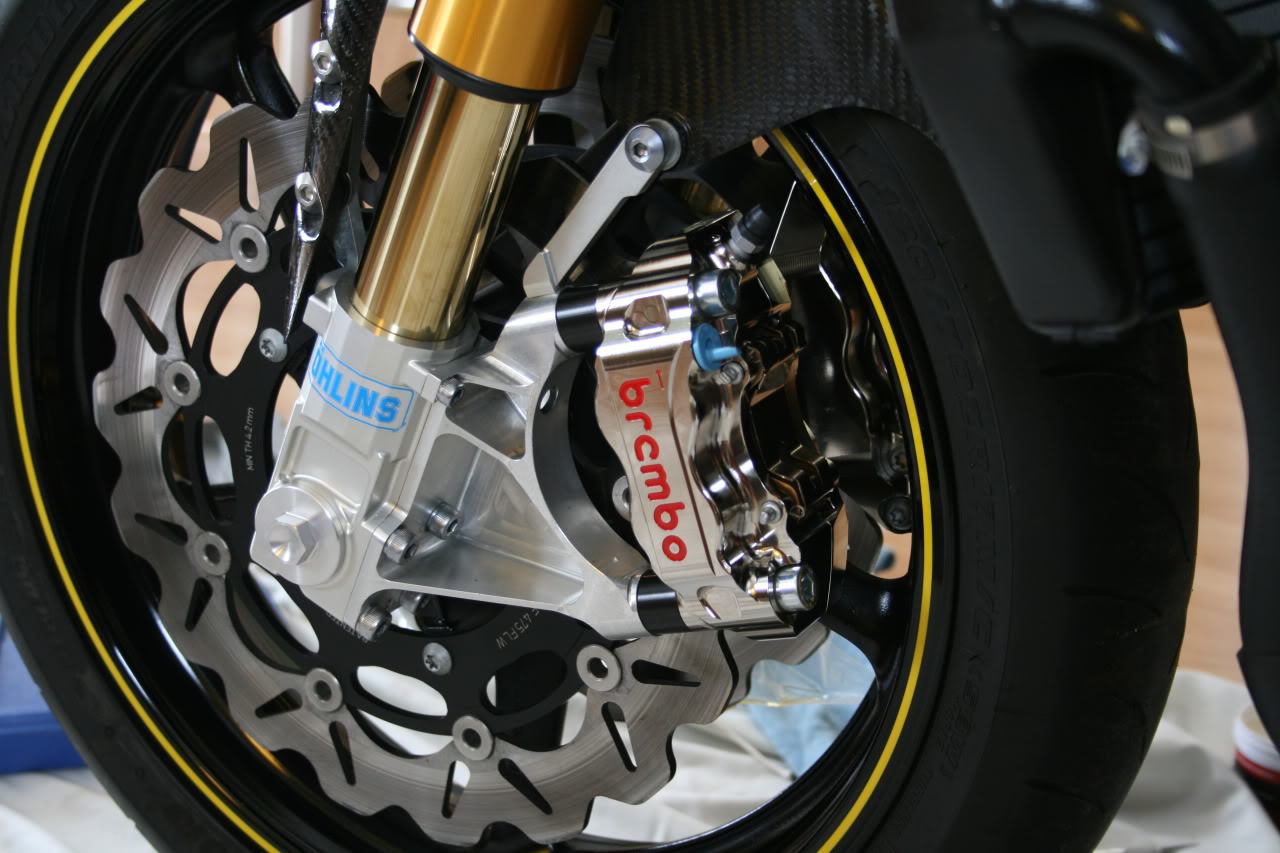
What are the benefits of radially-mount calipers?
First and foremost, being mounted from the rear means all the rider needs to do is install spacers and longer bolts when switching to a larger disc, instead of having to custom make a mounting bracket.
Picture from MotorMadMan
There is a myth surrounding radially-mounted calipers as having more braking power. Want us to be honest?
As we highlighted in Part 1, “brake power” is defined by the amplification of brake fluid pressure, in relation to the size of the master pump’s piston and caliper pistons’ sizes.
What radial mounting does though, with the lack of deflection, provides for a crisper feel when braking, i.e. better braking feedback, and in turn allowing for better modulation of the front brake.
Where it’s usually more important for the track than the streets.
The hydraulic brake system’s operation is easy to understand.
It consists of only a few main parts.
However, pay attention to your brake fluid and hoses.
Everytime we squeeze and press down on the brake levers, the brake system causes the motorcycle to slow down. it works day in, day out, throughout the bike’s lifespan. But have you ever thought about how it actually works?
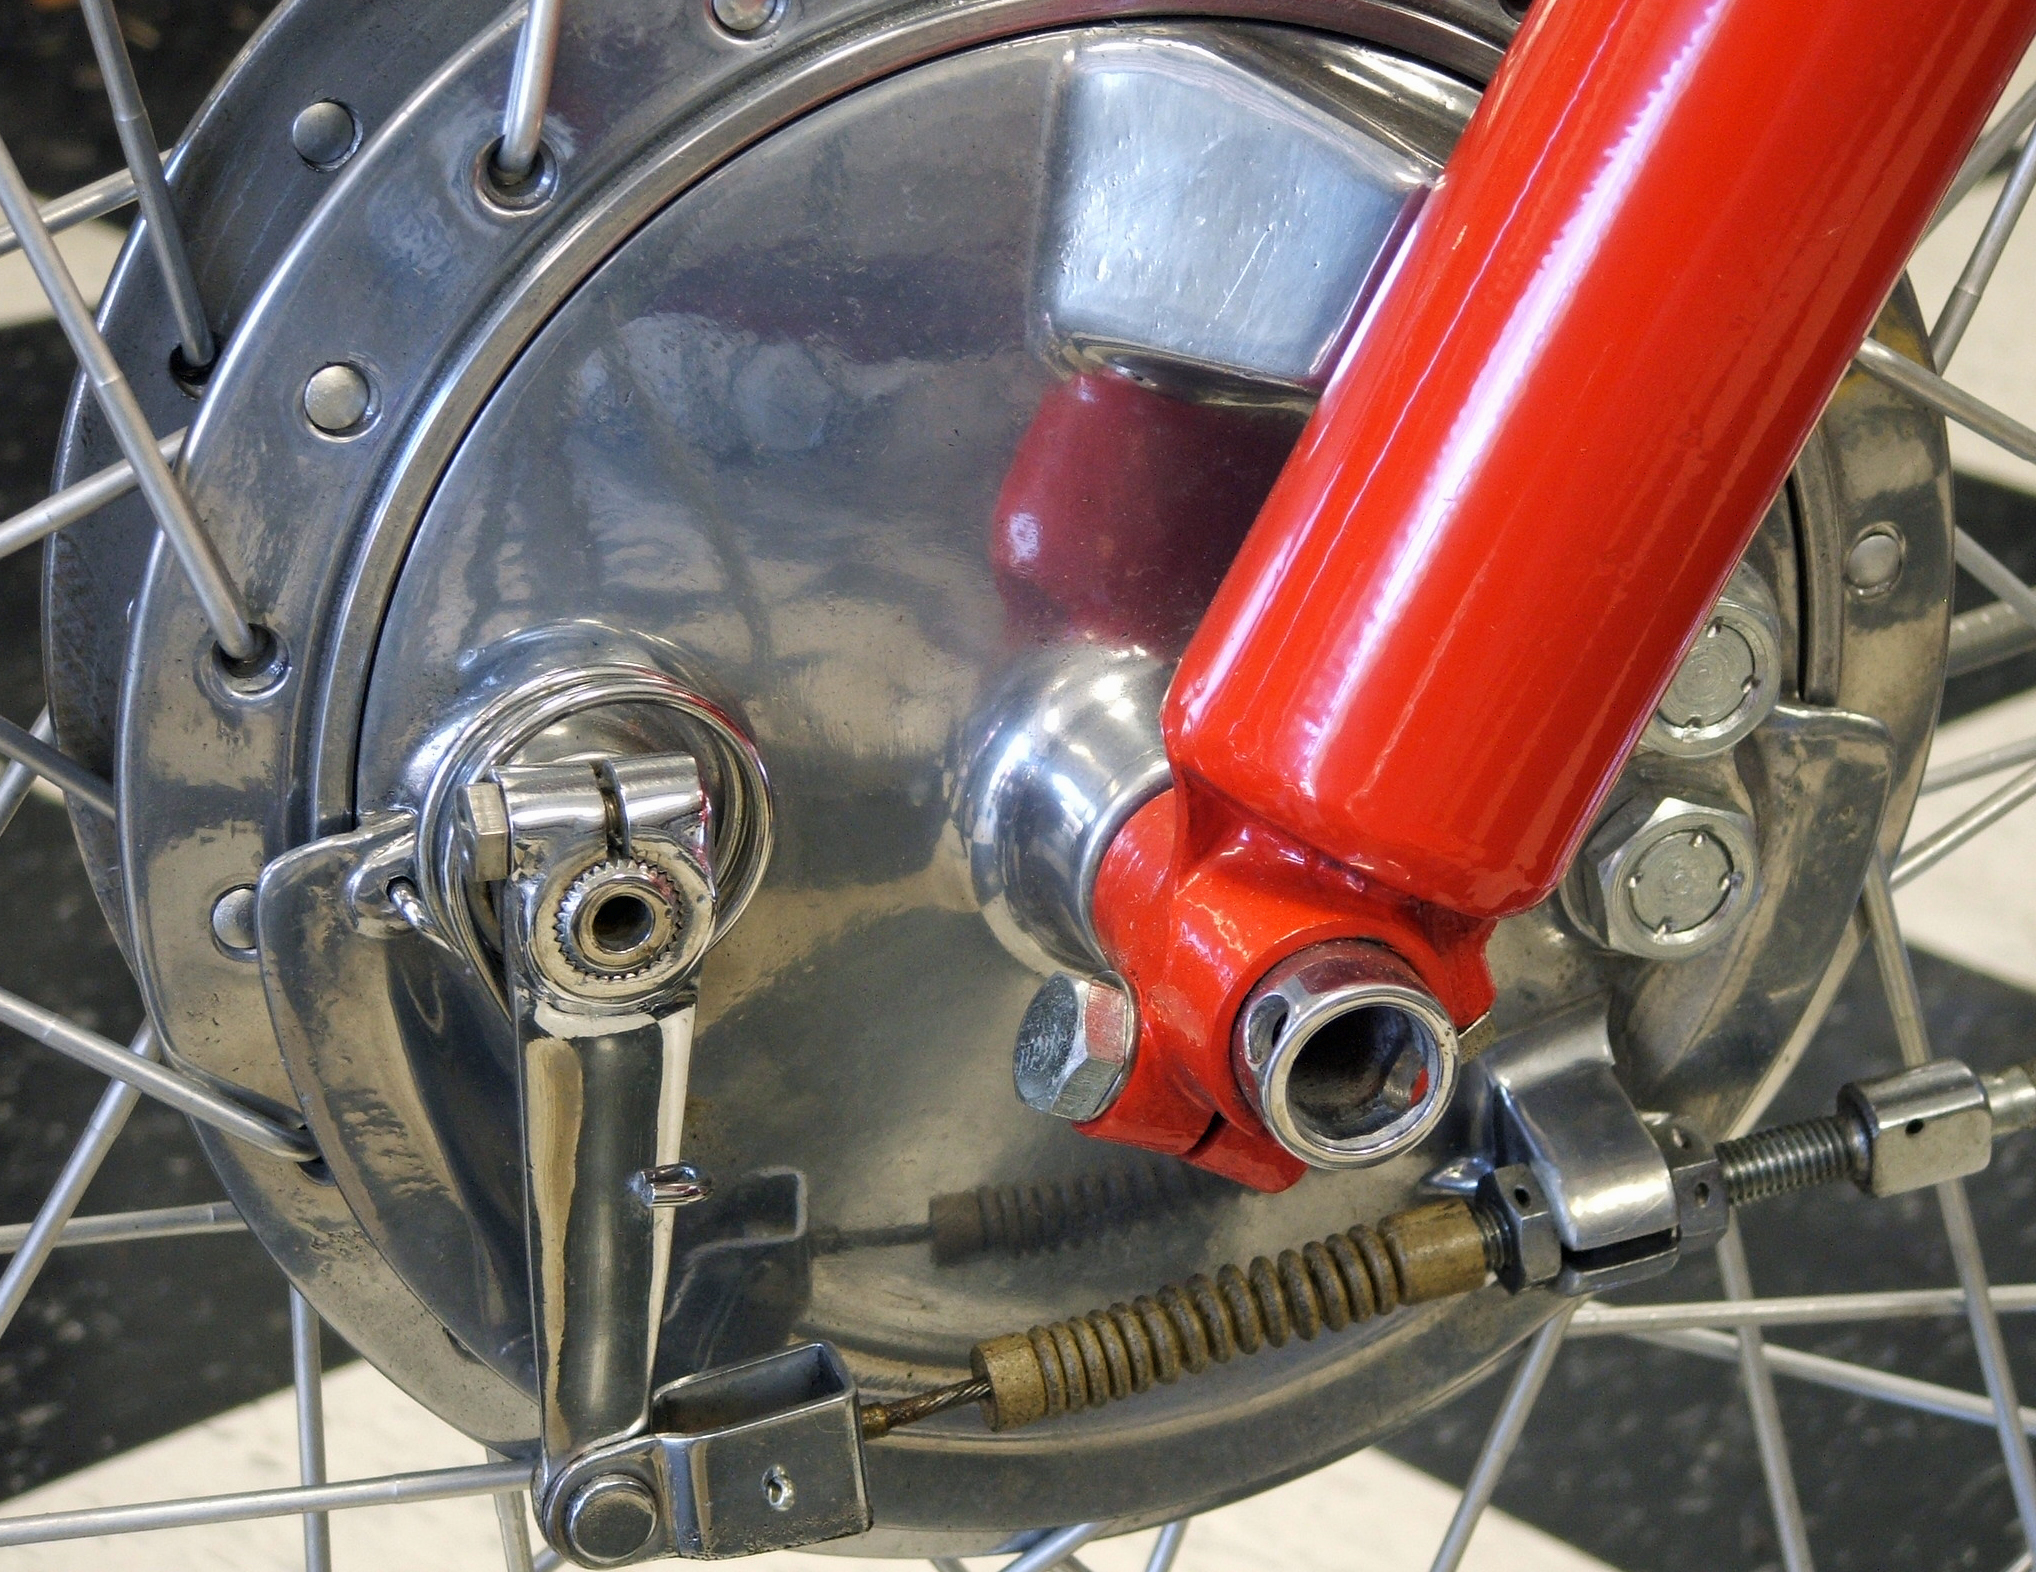
While the traditional cable-operated drum brakes are available on a certain number of bikes, they are being phased out for the hydraulic brake system, more commonly called disc brake system.
The brake system converts kinetic energy (contained in a moving object) to thermal energy (heat) by using friction. Brakes have evolved over time and some brake systems could actually slow a bike quicker than the latter could accelerate. In a recent overseas test on the BMW S 1000 XR, the bike accelerated from 0 to 160 km/h in 6.1 seconds, covering 151 metres. That fast! But it slowed from 160 to 0 km/h in 5 seconds in less than 100 metres.
The basic working principles of the hydraulic disc brake system is easy to understand. When you press the brake lever, the master cylinder pump pushes the brake fluid through the brake hoses to the calipers. In turn, this pressure pushes on the caliper’s pistons which have brake pads attached to them. The pads are compressed on to the brake disc.
Let’s look at the parts of a hydraulic brake system:
Master cylinder
More commonly called the “brake pump” or (“bulek pom” by your typical Chinese mechanic at the kedai motor), it converts mechanical force (when you press the lever) into hydraulic pressure. The brake lever pushes on a piston that presses on the brake fluid. The force with which you pull the lever is the leverage ratio and the size of the master cylinder piston determine the amount of pressure is subjected through the system, sometimes exceeding 1,000 kPa.
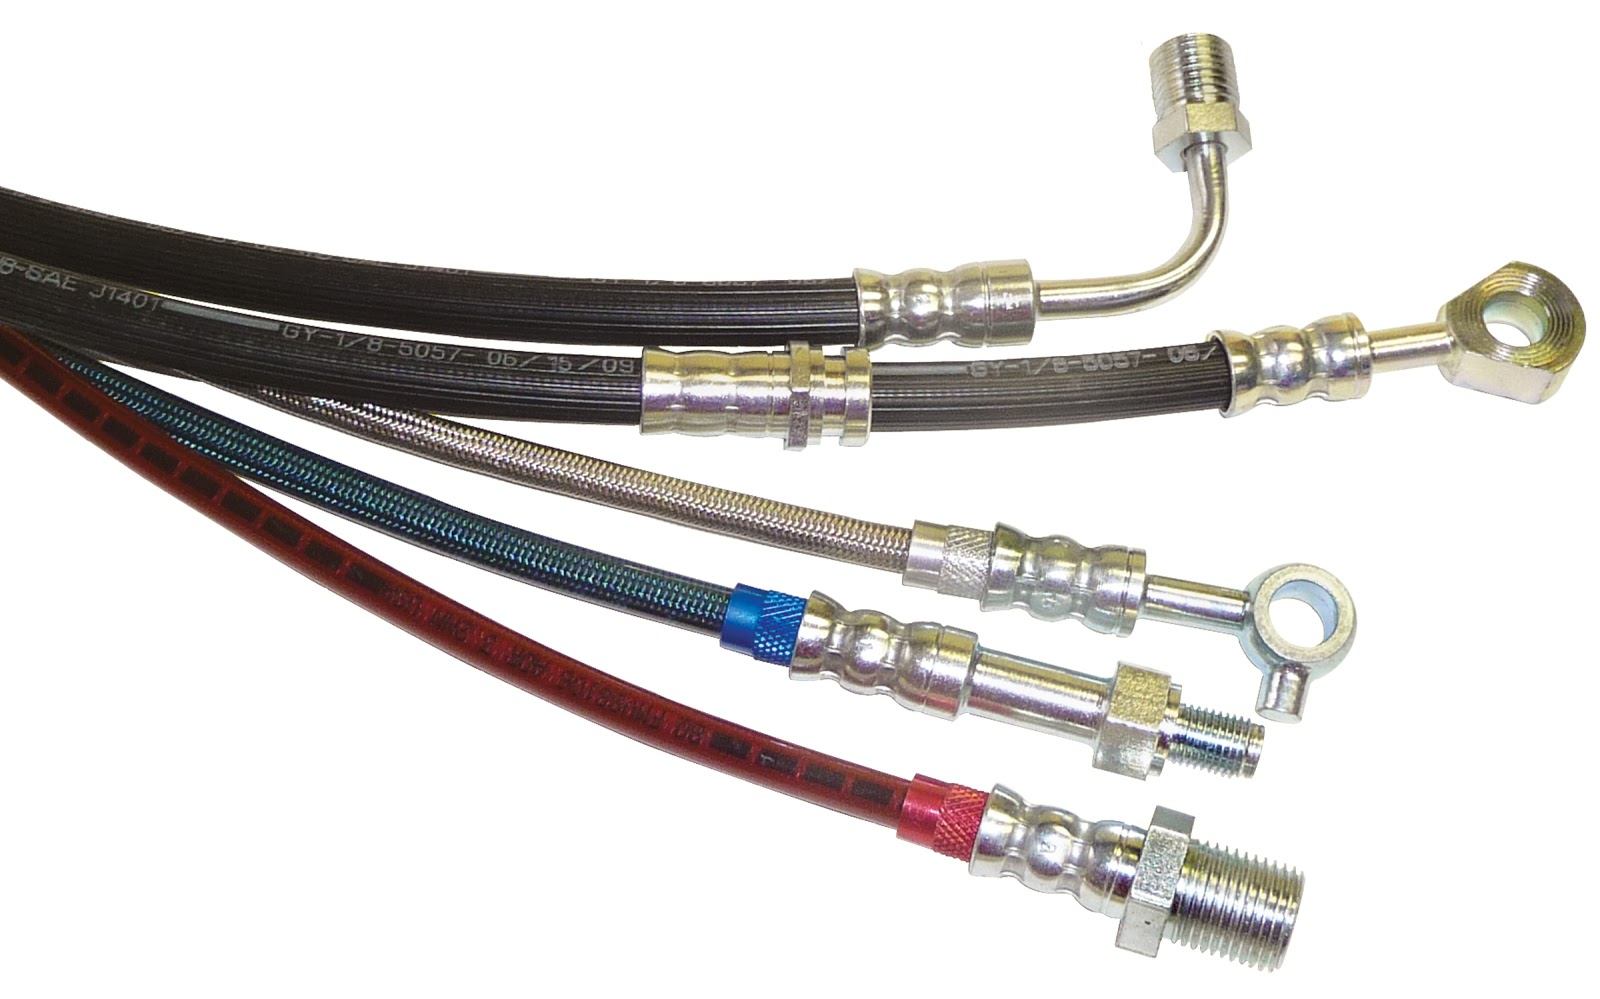
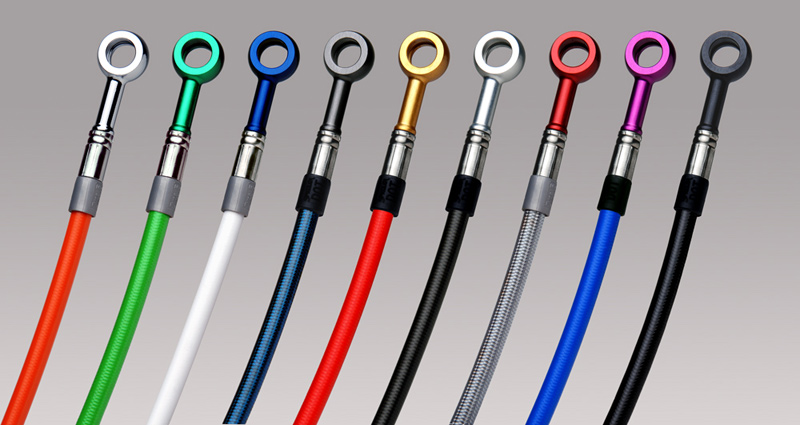
Brake Hoses
Hoses transmit pressure from the master cylinder to the calipers. They are typically multilayered, with a Teflon inner lining surrounded by braided nylon, or Kevlar, or stainless-steel reinforcing layer, and finally wrapped in a protective sheathing.
Contrary to popular belief, stainless steel-braided hoses DO NOT stronger braking. They provide a more consistent braking feel as they don’t expand like rubber hoses do when subjected to eyeball-popping hard braking.
Rubber hoses lose their strength over time, thus need to be replaced every four years.
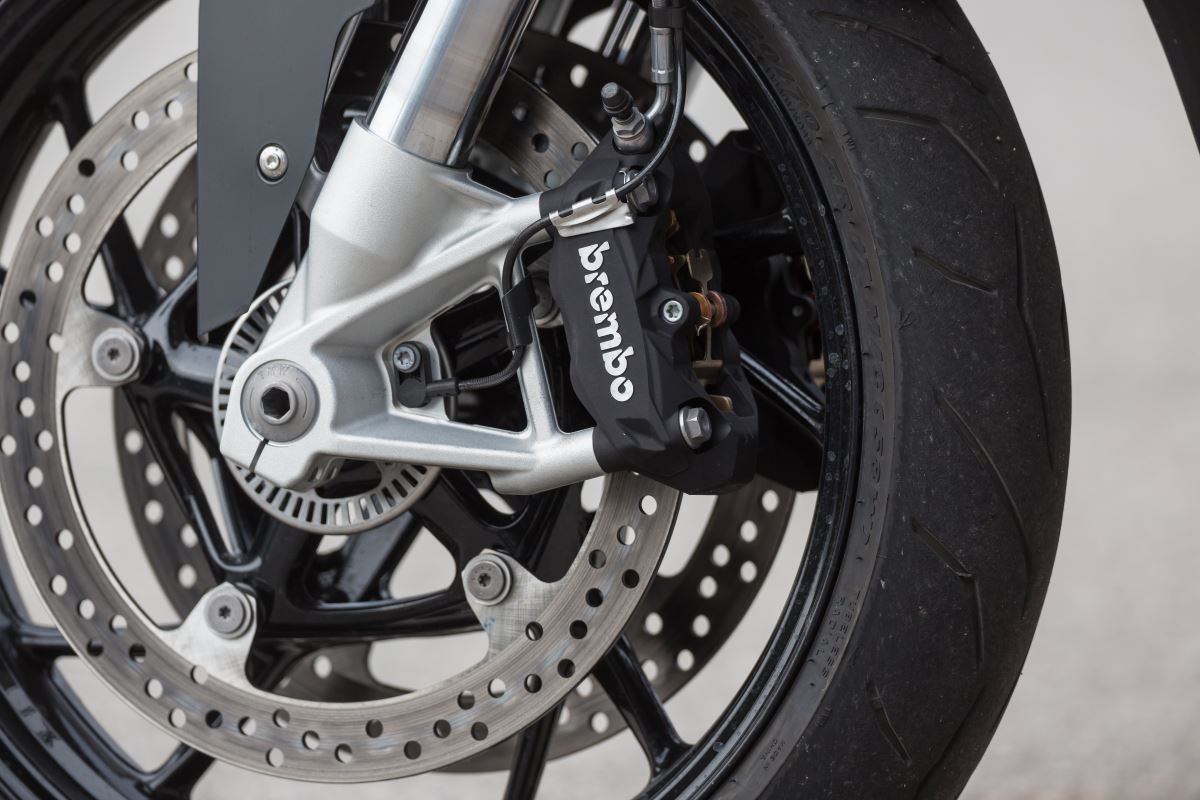
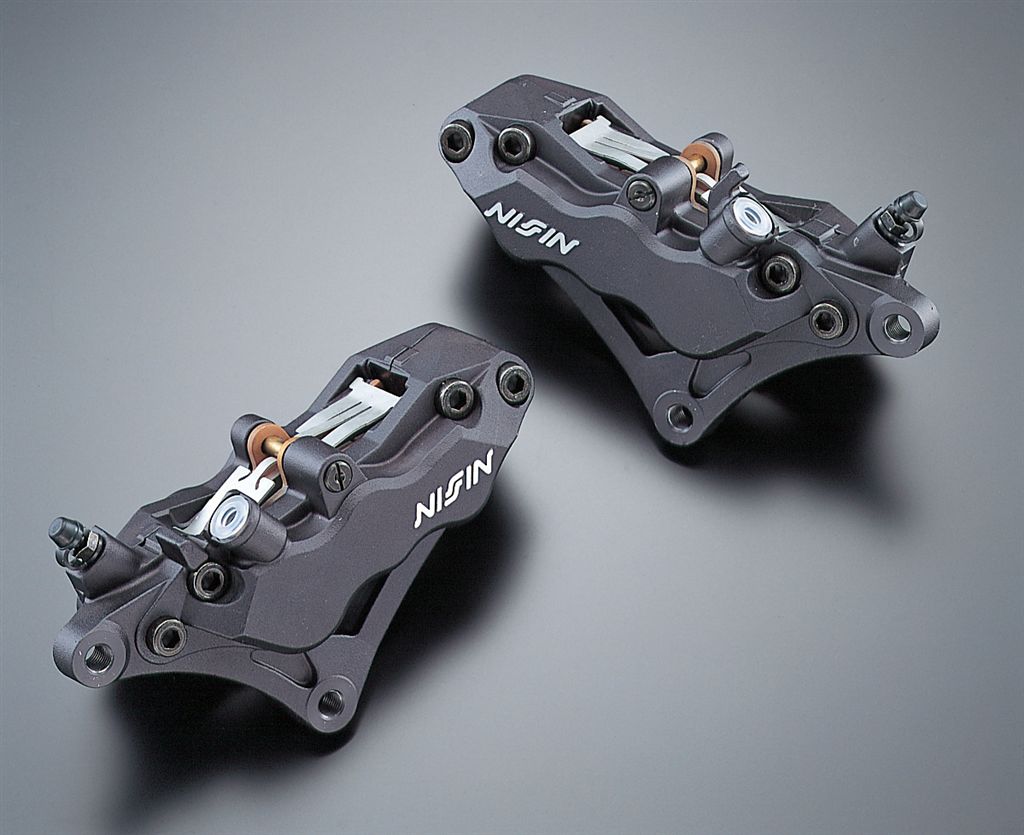
Brake caliper
This is also inexplicably called the bulek pom in the workshops. The real job of pumping braking fluid is handled by the master cylinder.
Anyway, it’s at the caliper where the hydraulic pressure is multiplied. This is because the pressure from the master cylinder is exerted uniformly on the much larger area of the caliper pistons. An adult male’s hand grip typically exerts only between 0.4 to 0.6 kPa, thus that has to be increased to more than 1,000 kPa.
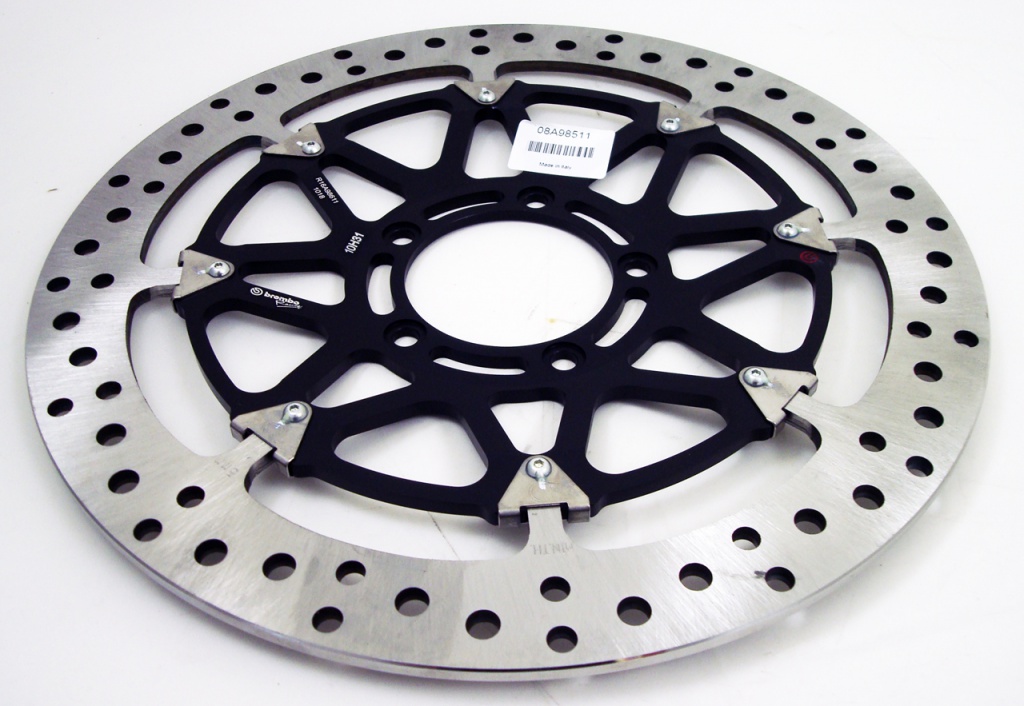
Brake Disc
The disc transfers the brake pads’ resistance to the tyre contact patch. Brake discs are usually made of stainless steel with variable amounts of iron. Modern discs are also drilled to assist in cooling, besides shedding water and debris.
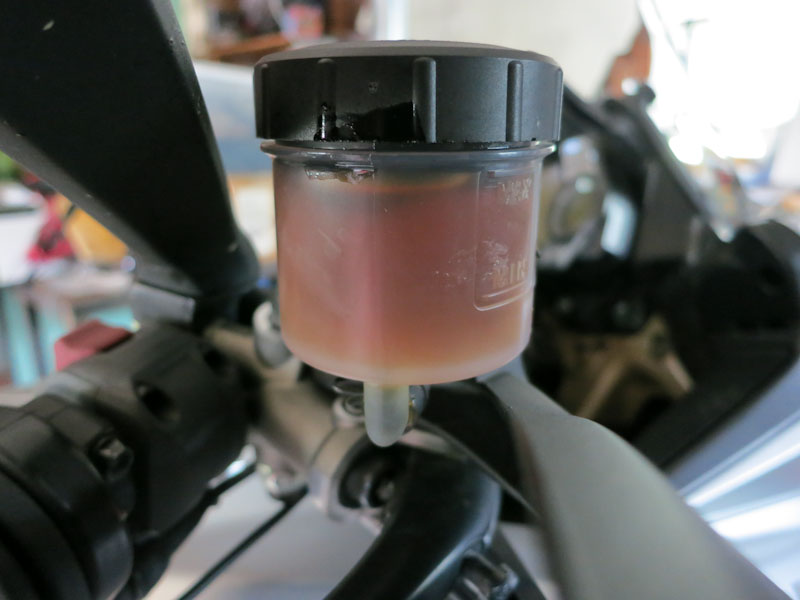
Brake fluid
Another incorrectly named item, usually called minyak brek (brake oil). It has nothing to do with oils. The misconception probably arose from being referred to industrial hydraulic fluids that are petroleum based.
The brake fluid is the medium which transmits force from the brake lever to the brake pads. The brake fluid isn’t as simple as one may be inclined to think. Other than being non-compressible to effectively transfer the pressure, it needs to have low viscosity to work with ABS components, has good lubricity for the master cylinder and caliper piston seals, offer corrosion resistance, and importantly has high boiling point.
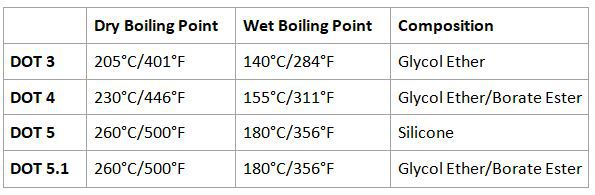
There are four grades of brake fluids. Glycol-based ones are DOT 3, 4, and 5.1, hence are mixable. DOT 5 is silicone-based and can’t be mixed any other type.
The glycol-based fluids are hydrophilic, meaning they suck in and absorb moisture from the air. Mixed with water, the brake fluid’s boiling point is lowered, causing brake fade. That’s why brake fluids need to replaced every two years.
DOT 5 on the other hand, is hydrophobic and rejects water. However, after repeated heating and cooling cycles, bad master cylinder and caliper seals, it will also ingest water eventually. However, DOT 5 brake fluid does not pull moisture out of the air own its own, thus have a longer lifespan. Military vehicles usually use DOT 5 since they sit idle for long periods of time.
Additionally, being silicone-based, it’s not caustic leading Harley-Davidson to using this previously.
Does this mean we should all convert to DOT 5? The short answer is “NO.” DOT 5 brake fluids are expensive, has high compressibility and higher viscosity (thicker) and thereby unsuitable for everyday use. Harley-Davdison has since reverted to DOT 4.
Each grade usually denotes the fluid’s boiling point, from the heat resulting from friction, rather than its chemical contents.
The US Department of Transport (DOT) specified each grade’s “dry” and “wet” boiling point. The latter is deemed to be completely free of moisture, while the latter contains 3.7% water, common after a year of regular use.
Observe how much performance drops away between dry and wet. That’s why brake fluid should be replaced every two years. Since the standard was set in the USA, we may need to replace it even earlier due to our climate’s high humidity and constant rain.
Water in the fluid lowers its boiling point, casing the brake lever to feel spongy and reducing braking performance – called “brake fade.”
That’s it for Part 1. We’ll talk about brake pads, caliper mounts, ABS, carbon brakes and so forth next time.