Getting your bike’s valve clearance checked out is important to make sure that the engine is running smoothly and at its optimum range.
If your bike is suffering from symptoms like difficulties to start especially in the morning or lost of power even though you’ve sent it for regular servicing, it’s time to get the valve clearances checked out.
Not maintaining proper valve clearance can result in not only lost of power of start up difficulties but also potential catastrophic engine failure or engine blows.
Having trouble getting your previous motorcycle started especially in the morning when it’s nice and cold? Feeling like your motorcycle is not running as powerful as it used to when brand new even though you regularly get it serviced? If you say yes, then we reckoned that it’s about time you get the engine’s valve clearance adjusted.
In the engine, there are a number of valves that control the intake flow of the much important air and fuel mixture into the engine and also to divert exhaust gases out. Simply put, it’s how the engine breathes and they’re one of the most hardworking parts of the internal combustion engine. With the constant revs of the engine, the valve clearances are reduced overtime in accordance to the wear of the valves and seats. As the bike gets older, the valve clearances have to inspected and maintained on a regular basis.
Why do you need to get the valve clearances inspected / adjusted?
As most of already know, motorcycle engines tend to run at a higher temperature due to its higher revs in a compact sizing. When things get hot, they expand and without proper clearances to accommodate for the expansion, things will get bad fast. That’s why engines have clearances between the cams and valves to help out with the longevity of the engine.
Getting the right amount of clearance is the key to a smooth performing engine. If the gap is too big, you’ll end up with a lot of valve-train noise. If the gap is too small or if there’s no gap at all, the valves won’t seat fully in their optimum positions. This is the usual case that occurs to most motorcycles after going through some miles (anywhere between 4,000km to 26,000km).
Getting the clearance adjusted is crucial not only for great performance but also to avoid any unwanted catastrophic failures or engine blows. If you continue to run the bike with little to no gap on the valve clearance, super hot exhaust gases can escape properly which in turn will burn the valves and cause a major dent to your wallet (not to mention all the heartache).
How do inspect / adjust the valve clearances?
![]()
On most modern four-stroke engines today, the task has been simplified altogether. It’s not as difficult as most you (or mechanics) may think but it does require some specific steps. First and foremost, check with your bike’s manufacturer on the service intervals required for the valve clearance to be checked or serviced. This is also a good idea to this as some bikes require different procedures but the idea is all the same.
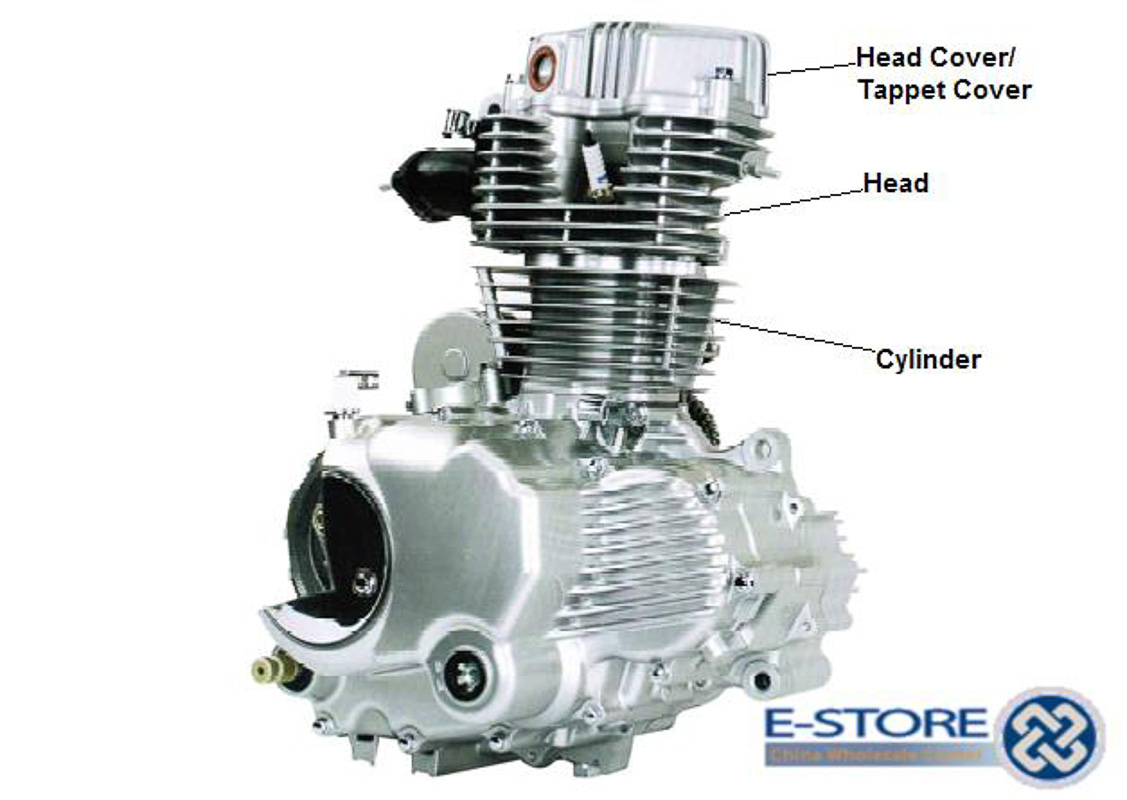
Most bikes will require you to remove several parts like the bodywork, fuel tank, air box, radiators and many more just to get to the cylinder head cover which houses the valves. If you’re running a scooter or moped, the process is much simpler. With that in mind, here are the steps on how to do so:
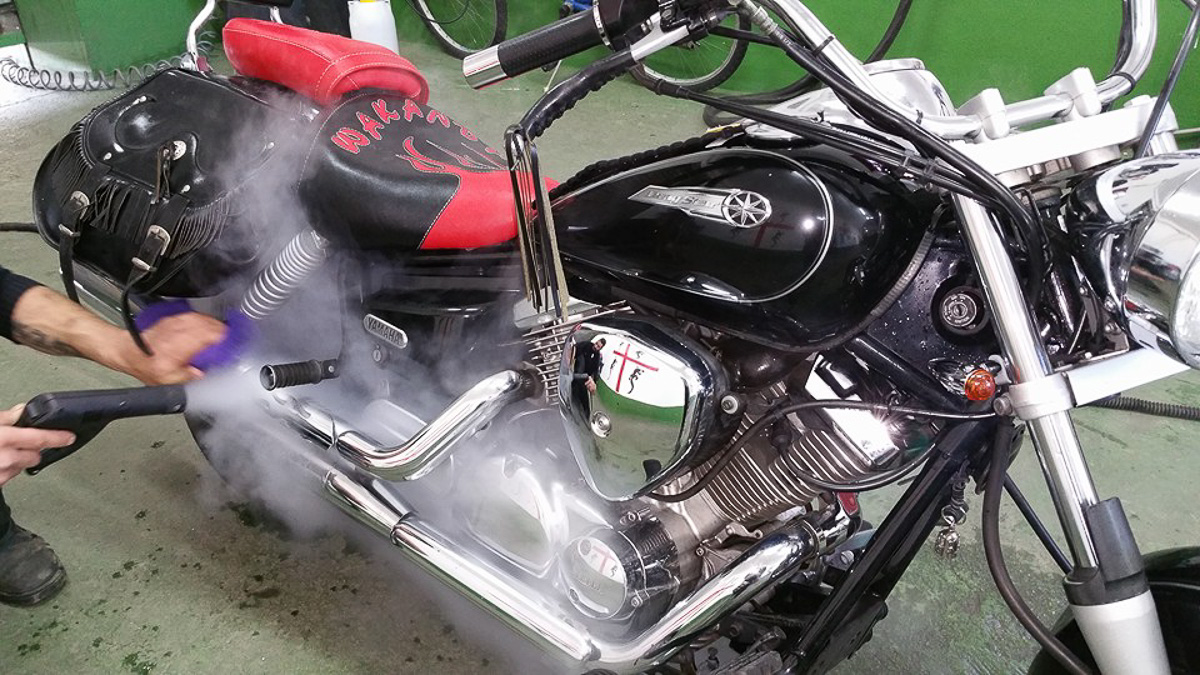
NOTE: When planning to get the valve clearance checked or adjusted, make sure that the engine is sufficiently cooled (preferably left overnight). You definitely don’t want to remove parts or adjust anything when they’re hot or expanded. Also, give your bike (and engine) a thorough wash as any debris that ends up in the cylinder head will be disastrous.
STEP 1 – Make way to the valve cover
Remove all the necessary parts including cables and wiring so that you’ll get free access to the valve cover. Blast everything with compressed air to make sure everything is nice and clean which also includes the spark plug hole.
STEP 2 – Remove valve cover
Remove all the necessary bolts holding the valve cover in place. Once that has been done, slowly pull it out making sure not to hit the cam timing gears. It’s a bit difficult as most bikes have a tight fit but it can be done with a bit of patience and elbow grease. Don’t forget to remove the head gasket as well.
STEP 3 – Set the pistons to Top Dead Centre (TDC)
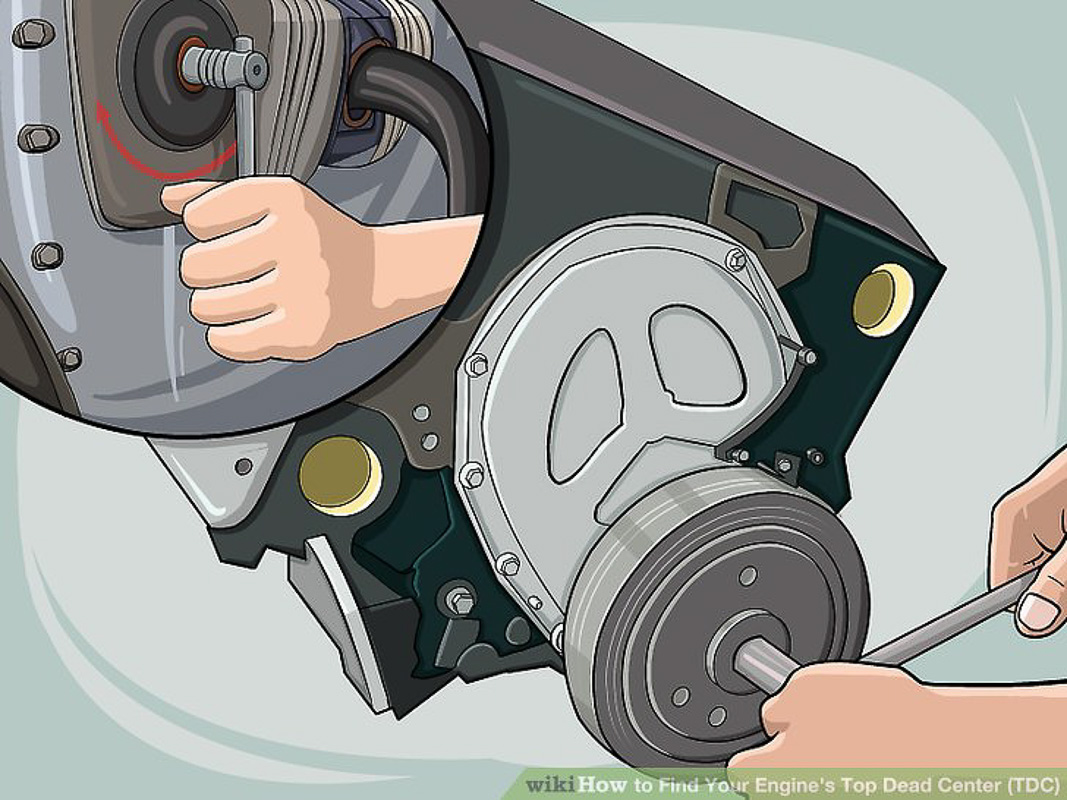
Top dead centre (TDC) is basically the point in the combustion cycle where none of the cams are applying any sort of pressure on the valves. To do this, just rotate the engine by moving the crank. You will need to remove the inspection plugs in order to do so.
NOTE: Top dead centre is the point during the engine’s cycle where the piston is at the highest part of its stroke. Different bikes have different ways of finding TDC, but typically the procedure is to use a socket to spin the crank anti-clockwise (the engine’s correct direction) until a marker in the flywheel lines up with the mark in the inspection hole.
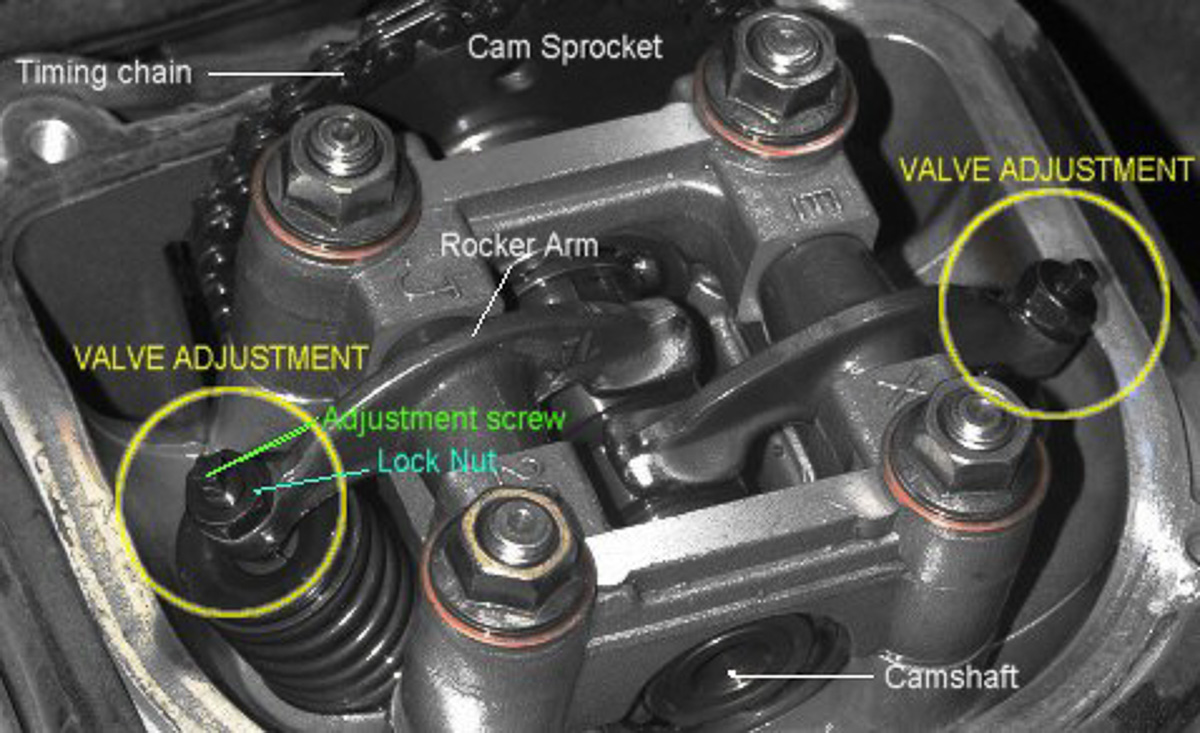
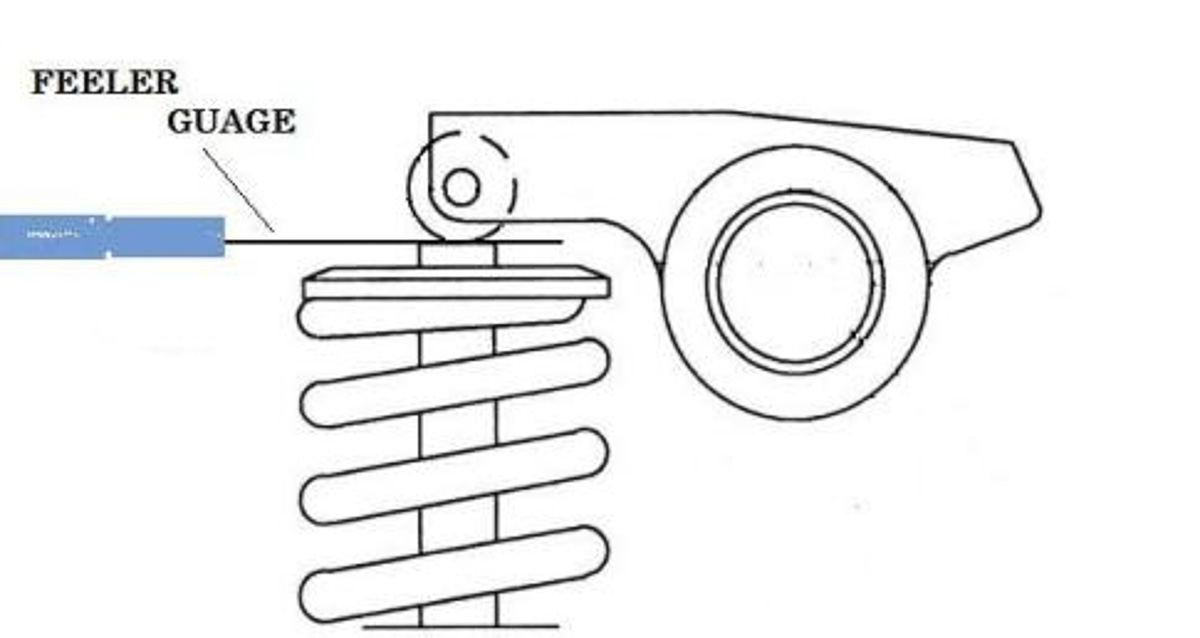
STEP 4 – Check the clearances
The valve clearance generally points to the gap between the cam (or rocker) and the valve bucket. In order for you to this successfully, you’ll need some feeler gauges. Determine the clearance using trial and error by seeing which gauges can slip under the cam freely. Record the valve clearance for all valves on a piece of paper. If the clearances are within tolerance, then you’re good to go. If not, proceed to the next few steps.
NOTE: Valve clearances are usually measured in hundredths of a millimetre. On a piece of paper, draw circles representing each valve, and the valve clearance above it. Get the right measurements from the bike’s manufacturer and you can make the proper adjustments. Repeat this process for every shim that is out of tolerance.
STEP 5 – Loosen the timing chain
If your valve clearances are outside of the preferred tolerances set by your bike’s manufacturer, you’ll need to change the shims on the valves. To remove the cams to access the buckets and shims, you’ll need to loosen the timing chain. Most bikes run automatic cam-chain tensioners. Simply remove the covering bolt, and then use a screwdriver to unscrew the tensioner until you feel a click and the chain becomes loose.
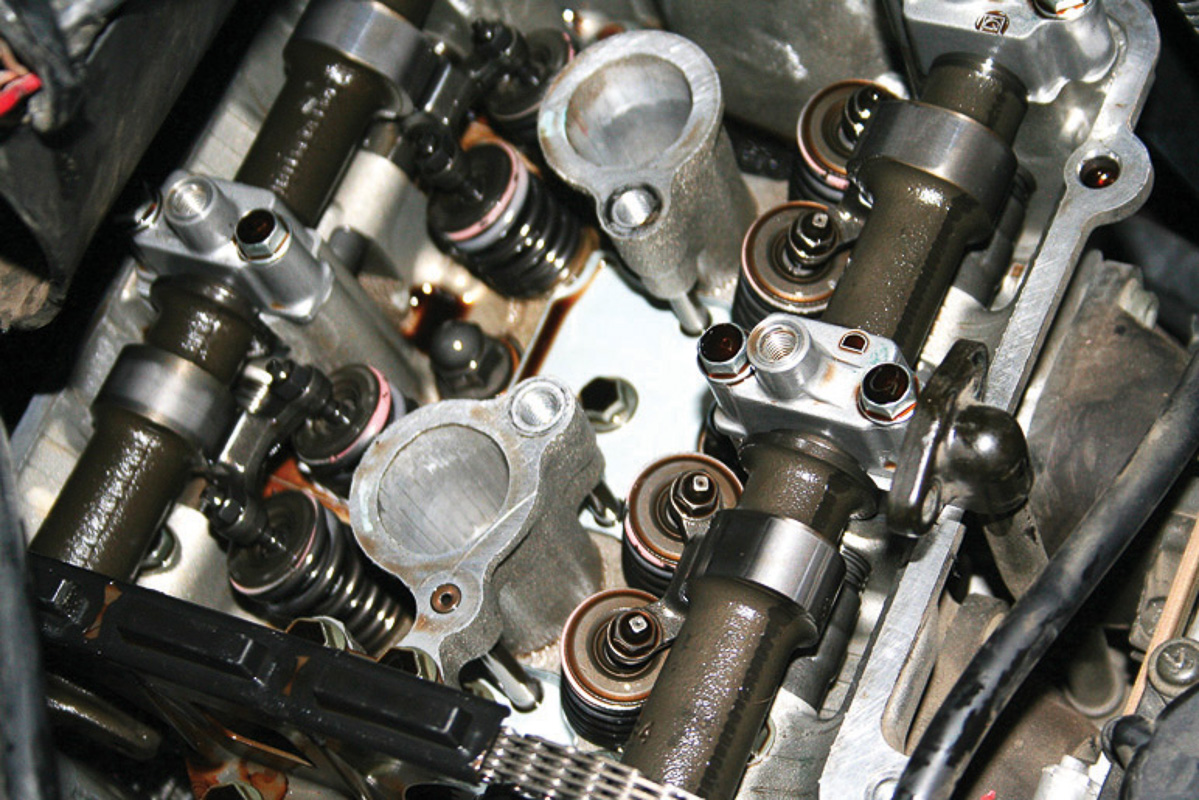
STEP 6 – Remove the cam/s
This step requires some careful manoeuvres but with the right knowledge, anything can be done. To remove the camshafts, which is necessary to access the valves that are out of spec, the first step is to remove the journal holder. Undo the bolts in the order recommended by your manufacturer to prevent the holder from warping. Two dowel pins keep the cam and journal holder aligned, so make sure you take care to grab them (or they can easily fall down into the engine). Then lift the cam/s out of the seats to access the buckets and shims.
STEP 7 – get a hold of your timing chain

If there’s only a need to adjust the valves under just one camshaft, simply hold the timing chain in place with a cable tie without having to remove the cams. if it requires you to remove the cams, use a screwdriver to make sure that it won’t fall down into the engine’s casing.
STEP 8 – Remove buckets
With great care, remove the buckets from the top of the valves using a pair of long-nosed pliers. Proceed with caution as to avoid any damages to the buckets. Having a magnet in your hand will make it easier to hold on to to avoid any drops. Place them together with the shims and note down on which valve they came from.
STEP 9 – Measure valve clearance shims
This step requires a set of vernier calipers as you need to measure the shims in order to adjust the valves accordingly. Make sure you have the recommended measurements according to your bike’s manufacturer.
STEP 10 – Get all parts reassembled again
Once you’ve got the correct shims in place, it’s time to reinstall the shims, buckets, cam, journal holder, timing chain and valve cover. Make sure you keep the timing chain taught and install it on the correct cam teeth, following your manufacturer’s instructions, so you don’t get the bike’s timing wrong. Also use the recommended specs for tightening the journal holder.

There you have it, folks. It’s quite a lengthy process to adjust something so small in the engine but at the end of the day, each and every engine part needs to play their roles right in order to perform at their optimum levels. Such a small adjustment to the valve clearance can make a difference between night and day. Get your valve clearances checked regularly and continue riding with peace of mind.